![]()
![]()
![]()
![]()
Chapter 2
*Installing Windows NT 4.0 Workstation
*Configuring a Disk
*Creating and Deleting Partitions *
Exercise 2-1 Partitioning a Hard Disk Using FDISK.EXE *
Exercise 2-2 Converting an Existing FAT Partition to NTFS *
Exercise 2-3 Re-Creating Windows NT Boot Floppies *
Bootable CD-ROM Drives *
Installation Options
*Exercise 2-6 Beginning a Windows NT Workstation 4.0 Installation from CD-ROM (Intel-Based Computers; Floppy-Less Installation) *
Exercise 2-7 Beginning a Windows NT Workstation 4.0 Installation from the Network for DOS Computers (Floppy-Less Install) *
Exercise 2-8 Beginning a Windows NT Workstation 4.0 Installation from the Network for Windows 95 Computers (Floppy-Less Install) *
Exercise 2-9 Beginning a Windows NT Workstation 4.0 Installation from the Network for Windows NT Version 3.51 and Earlier Computers (Floppy-Less Install) *
Exercise 2-10 Beginning a Windows NT Workstation 4.0 Installation from the Installation Boot Floppies *
The Setup Utility *
Exercise 2-11 Using the Windows NT Setup Program *
Upgrading from Windows 95 *
Upgrading Other Operating Systems *
From the Classroom *
Performing a New Installation *
Installing NT for Dual-Boot Purposes *
Third-Party Options *
Setting Up Windows NT Workstation 4.0 *
Hardware Identification *
Partition Selection *
Hard Drive Examination *
Graphical Portion of Setup *
Exercise 2-12 Proceeding with the Graphical Portion of the Windows NT Workstation 4.0 Installation Process *
Supplying User Information and a Computer Name *
Creating an Emergency Repair Disk *
Exercise 2-13 Creating an Emergency Repair Disk *
Exercise 2-14 Initiating a Recovery with Your Emergency Repair Disk *
Remaining Installation Steps *
Network Settings *
Network Adapter Configuration *
Select Protocols *
Enter Settings for Workgroups and Domains *
Miscellaneous Settings *
Removing Windows NT Workstation
*Exercise 2-16 Removing NT from a FAT Partition *
Certification Summary
*Two-Minute Drill
*Self Test
*
![]()
Chapter 2
Installing Windows NT 4.0 Workstation
![]()
| Hardware Requirements | |
| Configuring a Disk | |
| Installation Options | |
| Removing Windows NT Workstation |
The planning phase for Windows NT 4.0 Workstation is the most important part of an installation. If you take time to think out your hardware requirements, you can reduce the amount of downtime caused by incompatible hardware and installation problems. There are so many options to consider when doing a Windows NT Workstation installation that you want to make sure that you do not overlook any important details.
Part of the planning phase is deciding how to partition your hard disk. You can split your hard disk into many partitions or you can use just one. Determining how big your partitions should be can help you decide what type of file system to use: FAT or NTFS. For the exam, you must know the advantages and disadvantages of each file system.
Once you have planned your Windows NT 4.0 Workstation installation, you can decide what type of installation to perform. You have many different options: You can install Windows NT from a CD-ROM, over the network, or perform an upgrade from a previous version of Windows. An important part of the exam deals with how you decide what version of the Windows NT setup utility to use, so make sure that you understand which setup utility can be used when.
Part of knowing how to install Windows NT Workstation involves knowing how to remove Windows NT Workstation from your computer. There are a couple of different methods and you must know them both. You have to know how to remove Windows NT system files, the NT boot loader, and NTFS partitions.
To become certified, you’ll be quizzed to make sure that you understand every detail of the planning and installation process for Windows NT 4.0 Workstation. For example, Microsoft wants to make sure that you understand the importance of the Hardware Compatibility List and its role during installation. They want to make sure that you understand the advantages of using the NTFS file system or why you might be required to use a FAT partition. Microsoft wants you to know which version of the NT setup utility you will use and why.
The information covered in this chapter fully describes the basics of planning and performing a Windows NT 4.0 Workstation installation. It also gives you a grounding for more complicated topics covered in later chapters, like differences in file systems, protocol suites, and network connectivity.
In today’s world, computers are more powerful than ever before. Just a few years ago it was not even thinkable that a computer could do the work that Windows NT can do today. This expansion in technology comes at a price, namely the high hardware requirements of networking operating systems such as Windows NT 4.0 Workstation. Microsoft Windows NT 4.0 Workstation demands a lot of resources to run effectively.
The minimum requirements for Windows NT Workstation x86 are:
| Intel processor 486/33 or higher (Pentium, Pentium-Pro, Pentium II) | |
| 12MB of RAM for x86 (Intel) (16 – 32MB of memory is recommended) | |
| 120MB of free hard disk space | |
| CD-ROM drive (or have access to a network share or CD-ROM) | |
| VGA or higher resolution graphics card | |
| Microsoft mouse or compatible pointing device |
If you follow the minimum hardware requirements for Microsoft NT 4.0 Workstation you might be able to run a few applications, but you will not see a great boost in performance. The minimum hardware requirements are shallow at best and are not recommended if you are running many resource-intensive operations at once. If you try and run Windows NT 4.0 with the minimum requirements you are going to lose a lot of functionality and performance. The type of user you are and the software you have installed determine the hardware that works the best for you. For example, a power user needs a lot of memory to do heavy multitasking, whereas a developer might need a fast processor in order to compile code.
The following hardware is recommended for users who want to get the most of out of Windows NT 4.0 Workstation:
| Intel Pentium, Pentium-Pro, Pentium II Processor | |
| 32 – 48MB of RAM for x86 (Intel) | |
| 2GB of free hard disk space—This amount allows enough space for large pagefile and software applications | |
| Bootable CD-ROM drive | |
| SVGA or higher resolution, 3D graphics card | |
| Microsoft mouse or compatible pointing device | |
| 33.6 Modem or ISDN adapter to connect to the Internet | |
| 10/100MB network interface card with a PCI bus for greater throughput |
Windows NT offers many options to help configure your machine to your personal needs. For example, you can install backup devices, modems, ISDN adapters, network interface cards, and scanners. If you want a machine with more than the minimum requirements, you should look for one that has a lot of memory (RAM) and an excellent processor. These two key features will have the greatest effect on how your computer runs once all of the applications are installed.
Before selecting any hardware, the first thing you should do is check the Hardware Compatibility List (HCL) provided by Microsoft as a detailed inventory of all supported and tested hardware for Windows NT 4.0. In order for a vendor’s hardware device to appear on the HCL, the device must pass a series of tests given directly by Microsoft. These tests help ensure that no hardware problems will occur when you install Windows NT 4.0. Microsoft examines and tests the various hardware devices so that you do not have to.
If you encounter a hardware problem during installation because you’re running unsupported hardware, you are going to encounter problems with support. Microsoft cannot support hardware they have not tested. They will do their best to help you out, but they cannot guarantee anything. Simply said, Microsoft does not support hardware that does not appear on the HCL, so please check the HCL before beginning an installation.
To find the most current version of the HCL, check out Microsoft’s web site, Windows NT newsgroups, or the latest version of Microsoft TechNet. Microsoft updates the HCL periodically, as new and updated hardware passes compatibility testing.
If for some reason your hardware does not appear on the HCL, it does not necessarily mean that your hardware will not work with NT 4.0. It takes time before new hardware appears on the list. You can always check for the latest drivers on the vendor’s web site or use the hardware drivers that were distributed from the hardware vendor.
Just as you want to make sure that your hardware devices are Windows NT compatible, it is also smart to have the required device drivers handy in case the Windows NT setup program does not detect your hardware. During installation, Windows NT queries your computer and tries to recognize all your hardware devices, including the processor and the hard disk, and to determine the amount of memory. During the graphical mode of setup, Windows NT also tries to detect the rest of your hardware devices, such as the network card and the video adapter. Just in case Windows NT makes a mistake during the installation process, you can add the correct drivers on your own.
In an effort to make hardware detection easier, Microsoft includes the tool NTHQ (NT Hardware Query) on the Windows NT 4.0 Workstation CD-ROM in the \Support\Hqtool directory. This MS-DOS-based program can help you solve any problems you have installing Windows NT. You can start NTHQ from the floppy disk and use it to detect your hardware and settings for troubleshooting. You can also use it to determine whether your hardware meets the HCL standards.
To run NTHQ:
- Run Windows NT and insert a blank 3.5-inch floppy disk into the floppy drive.
- Run MAKEDISK.BAT from the \Support\Hqtool directory on the Windows NT Workstation CD-ROM.
- Leave the floppy disk in the drive and restart your computer.
Your computer restarts, with NTHQ running.
Before you begin installing Windows NT 4.0, you need to understand some basic information about your hard disk. In particular, you need to be familiar with creating and deleting partitions on different types of disks, as described in the following sections. You’ll get to know which tools to use when configuring a disk and what their advantages are by configuring a disk with a single or multiple partitions.
It is common to partition the hard disk before you install Windows NT 4.0 to make installation easier. If you have a large hard disk, you can set up as many partitions as necessary. If you have a smaller hard disk, you might create only one partition or only a couple of small ones. Partitioning the disk ahead of time is a more flexible approach than using Window NT 4.0 Disk Administrator after the system is running.
A partition is a logical division of a physical disk. After partitioning the hard disk, you need to decide which partition will be the system partition and which will be the active partition. The active partition is the partition that the operating system will boot from; it is often called the boot partition. If you decide to install Windows NT 4.0 somewhere other than the boot partition, that other partition is the system partition. If you install Windows NT on your boot partition, it becomes both your boot partition and your system partition.
Once you finish partitioning the hard disk, you can format your drives. This is the final step before you begin the installation procedure.
It is a good idea to make your disk partitions as large as possible, so that you have enough room to install all of your applications and still leave enough room for your pagefile. Depending on the size of your hard disk, you can leave it all one size or keep the system files on a smaller partition of 200MB.
Remember that Windows NT 4.0 does not support the High-Performance File System (HPFS) or the OS/2 file system. Unlike previous versions of NT, you cannot install Windows NT on an HPFS partition. You have the option of converting an existing HPFS partition to NTFS, or you can delete the old partition using the FDISK.EXE utility and create a File Allocation Table (FAT) partition instead.
The File Allocation Table (FAT) file system is used predominantly for MS-DOS and Microsoft Windows systems, such as Windows 3.x and Windows 95. To allow for backward compatibility, Windows NT fully supports the FAT file system. This support is also supplied because of FAT’s universal acceptance and accessibility by other operating systems. If you are going to use a RISC computer, such as an Alpha or MIPS machine, you must have a 2MB FAT partition for your system files.
The FAT file system has the following characteristics:
| Good for smaller hard disks of 200 – 400MB because of overhead. | |
| Does not offer any file or directory security. | |
| Does not protect files through the security features of Windows NT. | |
| Good if your system needs to be accessible through DOS or OS/2, but can be easily fragmented. | |
| Can accept partitions up to 2GB. | |
| Handles hard disks under 511MB. | |
| Universally accepted as a file system. | |
| Necessary if you wish to dual-boot between NT and DOS or OS/2. | |
| Cannot take advantage of fault tolerance. | |
| Needed for dual-boot capability with MS-DOS and Windows 95. | |
| Uses the 8.3 naming scheme. |
The newest version of the FAT file system is called FAT-32. FAT-32 allows for large hard disk support. With FAT-32, your partitions can surpass the 2GB limit. However, Windows NT 4.0 does not support FAT-32, and you cannot install on any partition formatted with FAT-32. (Windows NT 5.0 is expected to recognize the FAT-32 file system.)
The New Technology File System (NTFS) is the file system of choice for Windows NT. By installing Windows NT on an NTFS partition, you can take advantage of many of the NTFS features that are inherent in Windows NT, most notably security. NTFS provides granular security to both files and directories on the local workstation. This level of security is not available on a FAT partition.
Another reason to use an NTFS partition with NT is fault tolerance. NTFS supports many fault tolerant options that are part of the Windows NT operating system, including logging all changes to the file system.
Note that once a partition is formatted as an NTFS partition, you cannot convert it back to a FAT partition.
NTFS is characterized by:
| Better support for hard disks over 500MB. | |
| File and directory security that allows you to specify access levels. | |
| Complete Windows NT security model support, so you can specify who is allowed what kind of access to files or directories on the network and the local machine. | |
| Recognition only by Windows NT. When a computer is running another operating system (such as MS-DOS or OS/2), that operating system cannot access files on an NTFS partition on the same computer. | |
| Capability for expanding partitions beyond 2GB. | |
| Allowing up to 255 characters per filename. | |
| Fast access, recoverable and secure. | |
| Support for partitions as large as 16 exabytes. |
Creating and Deleting Partitions
You can create or delete partitions in either Windows NT or MS-DOS. When you begin a new installation it is a good idea to start by removing any existing partitions on the hard disk and creating new ones. This allows you to customize your partitions for your exact needs.
If you are using MS-DOS, you create or delete partitions using the fixed-disk setup program FDISK.EXE. Depending on what version of FDISK.EXE you use, you can eliminate non-DOS partitions and create new ones. If you are running Windows NT, you can create both NTFS and FAT partitions using the Disk Administrator tool found in the Administrative Tools common group. You can also convert existing FAT and HPFS partitions to NTFS using Disk Administrator, but you cannot later convert an NTFS partition back to a FAT partition.
Besides FDISK.EXE, there are other options for removing partitions. These include DELDISK.EXE, a third-party utility such as Partition Magic, or Delpart from the Windows NT 3.1 Resource Kit. Whenever you use these utilities, make sure you are certain before removing the partitions—once you delete them they are gone for good.
Exercise 2-1 Partitioning a Hard Disk Using FDISK.EXE
If you want to partition your hard disk, you have to first delete all other partitions before starting over. Using FDISK.EXE, you can partition the disk according to your needs.
Before you begin, it is important to remember that there is a specific order in which each partition can be deleted from the hard disk. You must delete any non-DOS partitions first, logical partitions second, the extended partition third, and the primary partition last. When removing an NTFS partition, make sure that the partition is not an extended partition. If it is, FDISK.EXE will remove the NTFS partition, but ruin the hard disk.
The reverse order applies when you create partitions. You must first create a primary partition, then an extended partition, then logical partitions, and finally you can convert to NTFS if you are using Windows NT.
If you currently have an HPFS partition, you have two options with Windows NT. You can either delete the partition and create a FAT partition in its place, or convert the HPFS partition to NTFS. Unlike previous versions of Windows NT, Windows NT 4.0 Workstation does not support installations that use existing HPFS partitions.
Deleting Partitions
To delete existing partitions:
- Boot your computer to MS-DOS.
- At the command prompt, type
FDISK.EXE
You are now running the fixed-disk setup program.
- To display your partition information, press 4.
- Press Esc to continue.
- Select 3 to indicate that you want to delete partitions.
- Decide which partition to delete and press the number associated with it.
- Type the volume label of the partition to verify the deletion.
- Type Y to confirm.
- Press Esc to continue.
Creating Partitions
To create new partitions:
- Create the primary DOS partition.
Do not use all of the free space unless you have a very small partition.
- Create the extended DOS partition.
- Create a logical partition or individual partitions on the extended partition.
- Convert your FAT partition either by using the CONVERT utility during Windows NT setup or by using Disk Administrator from Windows NT \ Administrative Tools (Common Group).
- Select option 2 to make one of your partitions active (usually this is your boot partition).
- Type the number of your partition to mark it as active.
- Press Esc to continue.
- Press Esc again to continue and exit FDISK.EXE.
- Reboot your computer to make the changes take effect.
- Format your active partition by typing:
A:\format C: /S
This formats your C: partition with the necessary system files so that you can boot your machine.
Exercise 2-2 Converting an Existing FAT Partition to NTFS
To take advantage of the NTFS file system’s capabilities after you have installed Windows NT on a FAT partition, you can convert your FAT partition to NTFS.
To convert a FAT partition to NTFS:
- Log on to your computer as Administrator.
- Click Start Menu | Programs | Command Prompt.
- At the command prompt, start the CONVERT.EXE conversion utility by typing:
C:\CONVERT D: /FS:NTFS
This converts the D: partition to NTFS.
- Reboot the computer to create the file system.
You must reboot because you do not have exclusive rights to the file system (NT cannot access the hardware directly). During the boot up process, the file system begins converting to the FAT partition to NTFS.
Exercise 2-3 Re-Creating Windows NT Boot Floppies
If you ever misplace or lose the three setup floppies included with Windows NT 4.0, you can make a new set using the NT setup utilities WINNT.EXE or WINNT32.EXE. If you are running Windows NT, you can use WINNT32.EXE with the /OX switch. If you are running any other version of Windows, use WINNT.EXE with the /OX switch.
You’ll need three blank, formatted floppy disks and the NT 4.0 Workstation source files to complete this exercise.
To re-create the Windows NT boot floppies:
- Log on to your computer as Administrator.
- Insert the Windows NT 4.0 CD-ROM into the CD-ROM drive.
- Click Start Menu | Programs | Command Prompt.
- At the command prompt, specify your CD-ROM drive.
- Make sure that you are in the Windows NT /I386 directory where the Windows NT setup utility is located.
- If you are running a version of Windows NT, type
D:\WINNT32.EXE /OX
D:\WINNT32.EXE /OX
The dialog box shown in Figure 2-1 appears and prompts you for the location of the Windows NT 4.0 source files. From here on, the WINNT32.EXE utility guides you through the process of creating the boot floppies.
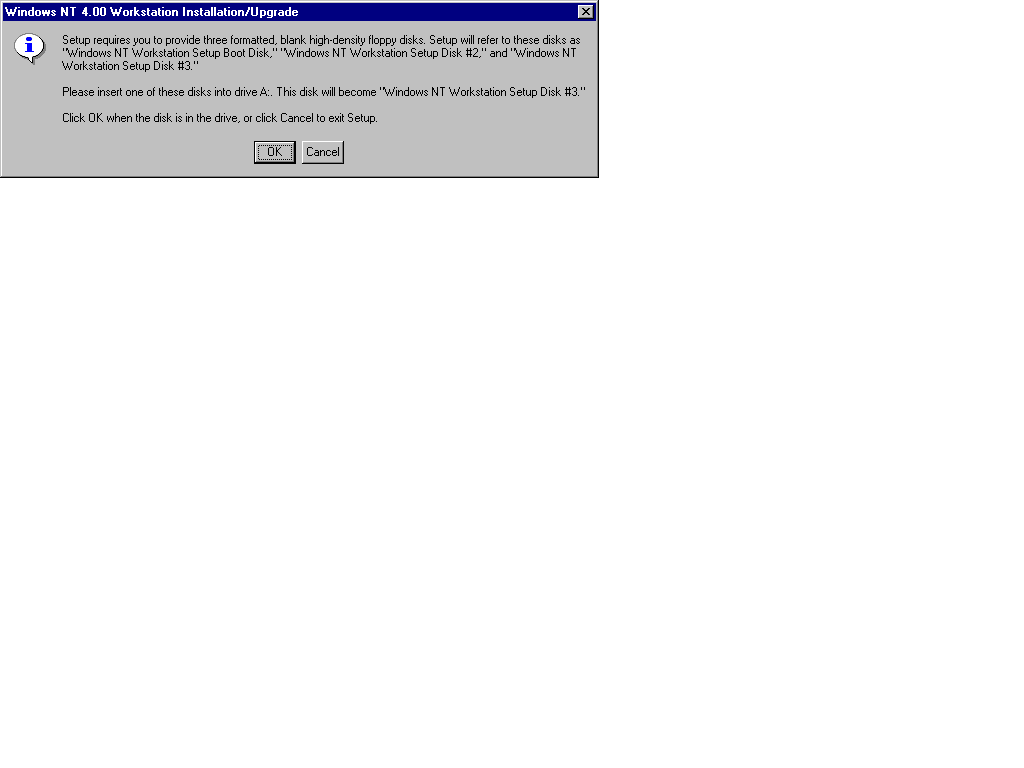
Figure 1: The Installation/Upgrade dialog box is the first one presented by WINNT32.EXE /OX.
Some of today’s computers allow you to boot your system directly from the CD-ROM drive. While this is helpful in some environments, it can cause considerable problems when setting up Windows NT. I never recommend using this functionality with Windows NT 4.0; always use a command prompt or simple batch file. A related problem occurs if the Windows NT 4.0 CD-ROM is left in the CD-ROM drive. This oversight can sometimes cause the computer to hang indefinitely during the initial setup phase. Rather than continuing with NT setup, the computer tries to boot from the CD-ROM. This is a known problem with Windows NT setup, and one you should take care to avoid.
Microsoft has included many different options for installing Windows NT 4.0 Workstation. You can install from the network, the local hard disk, or the CD-ROM drive. There are also options for upgrading, running fresh installations, and running multiple installations. Because every user does not require the same type of installation, many different command line switches are available, to allow for floppy-less or unattended installations, for example, or one to create the three setup floppies.
Exercise 2-4 Creating a Network Share of the Windows NT Workstation 4.0 Installation Files
If you are going to be doing multiple installations of Windows NT 4.0, you can keep the source files in a network share to allow multiple installations to run at once. This speeds up the installation time since the installation files are copied directly to the hard disk and not run off the CD-ROM. Also, anyone who has network access can begin a Windows NT installation.
To create a network share for NT Workstation 4.0 installation files:
- Logon as Administrator
- Create a directory on an NTFS partition on the server. Name this directory I386.
- From the Windows NT Workstation CD-ROM, copy all of the files in the /I386 directory to the new folder named I386.
- Share the directory named I386.
- Set Directory permissions on the folder for those who should have access to the source files.
- Use your MS-DOS network boot disk to start the network services.
- Once connected, map a drive to the server and the share point of the installation files.
- Navigate to the /I386 directory. This is where the Windows NT setup utility will be.
- At the Dos prompt type
F:\I386\WINNT.EXE /B
This /B switch in this command begins a floppy-less Windows NT installation.
Out in the real world the unattended installation feature can prove a useful tool for setting up Windows NT. This utility allows you to install large numbers of NT workstations very quickly and with minimum effort. This tool is great to use in situations such as rollouts or upgrades to multiple installations. It can save a lot of time over having to go around and perform manual installations. The UNATTEND.TXT file can provide information in response to any question that comes up during the installation, such as type of network drivers, values of TCP/IP parameters, values for the display configuration, types of file systems, or correct time zone. Here is the switch syntax for running this file during setup:
WINNT.EXE /B /U:UNATTEND.TXT /S:d:\I386
The /B switch after WINNT.EXE sets up NT without creating the three standard boot floppies. The /U switch signifies an unattended installation and specifies the name of the file (usually UNATTEND.TXT). The /S switch tells NT where to look for the UNATTEND.TXT file during installation. The setup program runs uninterrupted until it finishes, then prompts the user to log on.
OK, I can hear your first questions: What if there are different configurations? and how do you change things like IP addresses, computer names, or hardware settings? This is where the Unique Database File or UDF comes in. The UDF is divided into sections with UniqueIDs that describe any changes to the UNATTEND.TXT file, and that override the information in that file. All that you must specify during setup is which UniqueID should be parsed. When you run the setup procedure (probably just a simple batch file to connect to the server), enter the switches needed to tell the computer where to find the UDF, as follows:
WINNT.EXE /B /U:UNATTEND.TXT /S:d:\I386 /T:c: /UDF:test_ID,D:\UDF_File
As we learned earlier, we need to run the UNATTEND.TXT file as part of the installation procedure. The /T switch signifies a temporary directory to dump into and the /UDF switch is the name of the UDF that will be parsed. Here, test_ID is the UniqueID that is going to be looked at and changed according to the parameters listed in the UDF. The last part of the command gives the path to the UDF, in this case on the D: drive under the name UDF_File. Again, this UDF information overrides any section specified in the UNATTEND.TXT file.
Exercise 2-5 Using the SYSDIFF Utility to Customize an Installation
The SYSDIFF.EXE utility is used to pre-install applications during Windows NT setup. It takes before-and-after snapshots of your installation and creates a $OEM$ directory that can be used as part of the installation. The snapshots capture the Registry and files that are located on the computer, or any other drives. This is why it is important to have a fresh installation—you don’t want the snapshot to pick up any other files from other software applications.
SYSDIFF.EXE can be found on the Windows NT 4.0 Workstation CD-ROM in the \Ntwks40a\Support\Deptools\I386\ directory, or on the NT 4.0 Workstation Resource Kit CD-ROM in the \Ntrk_40\I386\Setup directory. This utility works well and is documented in Microsoft’s Guide to Automating Windows NT 4.0 Setup Word document.
As prerequisites to performing this exercise, you need to have SYSDIFF.EXE, SYSDIFF.INF, a fresh Installation of Windows NT 4.0 Workstation, and a software application that you want to install.
To customize an installation using SYSDIFF.EXE:
- Begin with a newly installed version of NT 4.0 Workstation.
This is the basis for the rest of the installations, so it should be as generic as possible.
- Copy SYSDIFF.EXE and SYSDIFF.INF to the hard disk of the local workstation.
SYSDIFF.INF must be installed in the same directory as SYSDIFF.EXE. SYSDIFF.INF is used to exclude changes to certain settings in the Registry or the pagefile, or to exclude any drives or partitions that would otherwise be taken during the initial snapshot.
- Using SYSDIFF.EXE, take a snapshot of the fresh installation by typing:
C:\SYSDIFF.EXE /SNAP C:\SNAP.IMG
The /SNAP switch causes SYSDIFF.EXE to take a snapshot of your fresh installation and create a file named SNAP.IMG as output. (You can name the snapshot output file whatever you like.)
- Load your software application according to its instructions.
- After you finish installing the software application, take another snapshot of the finished package or of the difference between the two. Type
C:\SYSDIFF.EXE /DIFF C:\SNAP.IMG C:\DIFF.IMG
The /DIFF switch causes SYSDIFF.EXE to take a snapshot of the installation after the software application is loaded. The C:\SNAP.IMG file is compared to the C:\DIFF.IMG file, which contains the changes since the software application was been installed. These changes include any additions to the Registry or new files. The DIFF.IMG file becomes the basis for automatically installing applications. (As with the snapshot file, you can name the difference file anything you want.)
- Add the /INF switch to the SYSDIFF.EXE command.
This switch builds a $OEM$ directory beneath the /I386 directory to store the needed changes, and calls an .INF file that automatically sets up the pre-installed application.
C:\SYSDIFF.EXE /INF /U /m C:\DIFF.IMG F:\I386
The /INF switch creates a .INF file that sets up the pre-installed applications that were loaded as part of Windows NT setup. The /U switch generates a Unicode text file. (The default is ANSI codepage, but that does not affect the end results.) The /m switch causes the profile to be mapped to the default user so that everyone who logs onto the workstation has access to the installed applications. C:\DIFF.IMG is the location of the difference file. F:\I386 is the location of the Windows NT source files, where the $OEM$ directory is built. Also in the $OEM$ directory are the CMDLINES.TXT file and the .INF file that contain the instructions for pre-installing the applications. CMDLINES.TXT is made up of commands that call specific sections of the .INF file that set up the applications. Here is an example:
[Commands]
"Rundll32 setupapi,InstallHinfSection DefaultInstall 128 .\ThisIsWhateverInfFIleThatYouCreate.INF"
The name of this file is whatever you named your difference file, but with the .INF extension. This file contains the Registry changes needed to install the applications. The command in CMDLINES.TXT makes a direct call to a specific section in the .INF file. All that is left to do is reinstall NT 4.0 Workstations on the target computers. When these changes are through, NT 4.0 Workstation will install on as many workstations as necessary, with the applications already installed.
| SYSDIFF.EXE—This executable file pre-installs software applications. | |
| UNATTEND.TXT—This script file outlines the setup for Windows NT Workstation. | |
| Unique Database File (UDF)—This file allows you to set up unique parameters for the installation, such as computer names or TCP/IP addresses. |
Network Installations vs. CD-ROM Installations
There are many different ways to install Windows NT 4.0 Workstation. What you need to know is what type of installation will work best for you. Do you want to walk around from machine to machine and install Windows NT from a CD-ROM? Or do you want to keep the source files in a central location and use the network to perform installations? Each choice carries various advantages and disadvantages. Performing a CD-ROM installation can be considerably faster if you only have to install one machine. If multiple machines need to be installed then a network install might be your best option. However, performing multiple installations from the network can take a long time if all installations are done at once and the server is slow. Once you decide your basic approach, you can begin the procedures for installation.
If you are installing Windows NT 4.0 Workstation from the CD-ROM, you need the three NT setup disks to begin installation unless you are going to use the /B switch and do a floppy-less installation. The three setup disks install a mini version of Windows NT on your computer that aids in the setup process.
If you want to save time, you can perform a floppy-less installation with the Windows NT setup utility. Rather than waiting to be prompted for each of the three boot floppies, with this approach you copy the files from the CD-ROM directly to the hard disk. If you are using an earlier version of Windows NT, you can use the WINNT32.EXE setup utility; if you are using any version of MS-DOS or Windows, you can use WINNT.EXE.
Make sure you have the Windows NT 4.0 Workstation CD-ROM before beginning this exercise.
To install NT 4.0 from CD-ROM on an Intel-based computer:
- Place the CD-ROM into the CD-ROM drive.
- Go to a Command Prompt to navigate to the CD-ROM drive.
- Specify the drive that contains the CD-ROM.
- Make sure you are at the root of the /I386 directory to get to the setup utility.
- If you are running an early version of Windows NT, type WINNT32.EXE /B at the command prompt. For all other versions, type WINNT.EXE /B.
D:\I386\WINNT.EXE /B
The /B switch designates a floppy-less install. Most installations are run this way.
For this exercise, you need the MS-DOS network boot floppy and a network share point that contains the source files or /I386 directory for Windows NT 4.0 Workstation or for the Network CD-ROM.
To install NT 4.0 from CD-ROM on a DOS-based computer:
- Using your MS-DOS boot disk, establish a connection to the share point containing the setup files. (By default this is the /I386 directory.)
- From the network share, make sure that you are in the root of the /I386 directory. This is where you will find the setup utility, WINNT.EXE.
- Since this exercise assumes you are not currently running an earlier version of Windows NT, you need to type WINNT.EXE /B at the command prompt.
This begins the installation process for Windows NT 4.0. Since you are performing a floppy-less installation, you have to use the /B switch. The installation parameters should look like this.
F:\I386\WINNT.EXE /B
Since you cannot upgrade Windows 95 to a Windows NT workstation, you need to begin a fresh installation. Because it is more convenient, this exercise performs a floppy-less installation from Windows 95.
For this exercise you need a Windows 95 computer and a network share point that contains the Windows NT 4.0 Workstation source files.
To perform an NT 4.0 installation from the network for a Windows 95 machine:
- In Windows 95, open up Command Prompt and connect a network drive to the share point that contains the Windows NT 4.0 source files or /I386 directory.
- Verify that you are in the network share point that contains the Windows NT 4.0 Workstation source files.
- Run the 16-bit version of the setup utility, WINNT.EXE, by typing:
F:\I386\WINNT.EXE /B /w
It should be noted that this is not a recommended feature in Windows NT and is not officially supported by Microsoft. It bypasses some safety features during installation, so use this method at your own risk.
For this exercise, you need to be running an earlier version of Windows NT, so that you can run the WINNT32.EXE setup utility. This version takes advantage of Windows NT’s processing power and 32-bit capability. WINNT32.EXE runs much faster than WINNT.EXE because it is a 32-bit multithreaded application. Windows NT can take advantage of its speed during installation.
For this exercise, you need a network share point that contains the Windows NT 4.0 Workstation source files.
To install NT 4.0 Workstation from the network for earlier versions of Windows:
- Logon as Administrator.
- Go to the MAIN program group.
- Click the MS-DOS icon.
- Map to a network drive that contains the NT 4.0 Workstation source files. (For example, type Net use Z: \\Server_Name\I386.)
- Make sure that you are in the /I386 directory. (This directory contains the WINNT32.EXE setup utility.)
- At the command prompt, type
Z:\I386\WINNT32.EXE /B
When you install Windows NT Workstation, you always have the option of installing from the three setup floppies included with the product.
For this exercise, you need the three NT setup boot floppies and the Windows NT 4.0 Workstation CD-ROM.
To install NT 4.0 Workstation from the original boot floppies:
- Turn on your computer and insert the boot disk labeled Windows NT Setup Disk 1.
- When the operating system prompts you, insert Windows NT Setup Disk 2.
- When prompted, insert the Windows NT 4.0 Workstation CD-ROM and follow the instructions that appear.
- Insert the third NT setup disk to add drivers if the system requests them.
To set up Windows NT 4.0 Workstation you need to use either the WINNT.EXE or WINNT32.EXE setup utilities to begin installation. The operating system you are currently using determines which version of the Windows NT setup utility you use:
| WINNT.EXE is a 16-bit version, used to begin installation from a CD-ROM, from the network, or from any type of MS-DOS-based installation. This utility cannot be used with Windows NT. | |
| WINNT32.EXE is a 32-bit version, used to begin any installation or upgrade under any version of Windows NT. WINNT32.EXE is much faster than WINNT.EXE. Also, when you run WINNT32.EXE and files are being copied from the server’s share into the $WIN_NT$.~LS directory on the local hard drive, Windows NT is still running. |
The setup utility can be run at the command prompt, through Windows Explorer, delivered via SMS, or as a batch file. Other options can be selected, such as the switch that controls floppy-less installations (/B) and unattended installations (/U).
Exercise 2-11 Using the Windows NT Setup Program
You are about to install Windows NT and you must decide which version of the Windows NT setup utility you are going to use. You can use the 16-bit version, WINNT.EXE, if you are going to install Windows NT from a network installation or any non-NT version of Windows. If you are using any version of Windows NT, you have only one choice—the 32-bit version, WINNT32.EXE. Although both versions do exactly the same thing WINNT32.EXE is quicker since it takes advantage of NT’s processing power.
For this exercise, you need the Windows NT 4.0 Workstation source files (either CD-ROM or network share point).
To run the Windows NT setup utility:
- Insert the Windows NT Workstation 4.0 CD-ROM into the CD-ROM drive.
| If you are running a previous version of Windows NT, run WINNT32.EXE by typing: |
F:\I386\WINNT32.EXE
| If you are performing an installation from the network, from CD-ROM, or from MS-DOS, run WINNT.EXE by typing: |
F:\I386\WINNT.EXE
The syntax you use to run either WINNT.EXE or WINNT32.EXE is the same:
WINNT.EXE [/S:sourcepath] [/I:inf_file] [/T:drive_letter] [/X] [/B] [/O[X]] [/U:answer_file] [/UDF:id, [UDF_file]]
WINNT32.EXE [/S:sourcepath] [/I:inf_file] [/T:drive_letter] [/X] [/B] [/O[X]] [/U:answer_file] [/UDF:id, [UDF_file]]
Refer to Table 2-1 for an explanation of the various switches and options.
| /S:sourcepath | Specifies the location of the Windows NT files. |
| /T:drive_letter | Forces the setup utility to place temporary files on the specified drive. Use this option if you are going to install Windows NT on a different partition. |
| /B | Causes the boot files to be loaded on the system’s hard drive rather than on floppy disks, so that floppy disks do not need to be loaded or removed by the user. |
| /OX | Specifies that the setup utility create boot floppies for a CD-ROM or floppy-based installation. |
| /I:inf_file | Specifies the location of an answer file that provides answers for the user. |
| /X | Prevents the setup utility from creating the boot floppies. Use this switch when you already have setup boot floppies. |
| /O | Specifies that the setup utility create only boot floppies. |
| /U:answer_file | Specifies the location of an unattended answer file that provides answers the user would otherwise be prompted for during installation. |
Table 1: WINNT.EXE and WINNT32.EXE Switches and Options
Upgrading from Windows 95 to Windows NT 4.0 Workstation is not an officially supported option in this release of NT. However, an undocumented /W switch is available. You must use it with caution; if you have problems do not call Microsoft because they will not be able to help you.
Upgrading Other Operating Systems
It is possible to upgrade your existing MS-DOS, Windows 3.x, or Windows NT operating system to Windows NT 4.0. For Windows 3.x and Windows NT 3.x, you can save your existing configuration settings and have them apply in your Windows NT 4.0 Workstation environment. The operating system you are currently using determines what version of the Windows NT setup utility you can use for an upgrade. If you’re running an earlier version of Windows NT, use WINNT32.EXE. For all other upgrades and non-Windows NT versions, run WINNT.EXE.
The MS-DOS operating system is can be easily upgraded or dual-booted with Windows NT 4.0. Using the WINNT.EXE setup utility, you can perform any type of installation available. When upgrading an MS-DOS based system, the Windows NT setup program installs the Windows NT boot loader to let the user choose which operating system to use each time the system is started.
Upgrading from Windows 3.x for MS-DOS
It is possible to install Windows NT in the same directory as an existing version of Windows 3.x. Windows NT places its system files in a \<windows root>\SYSTEM32 directory. The Windows NT setup program also places some files that can be used with any version of Windows, such as .BMP files, in the \<windows root> directory.
If you choose not to install Windows NT into the same directory as Windows 3.x, Windows 3.x Program Manager groups will not be available under Windows NT. If Windows NT is installed in the same directory as Windows 3.x, the setup process imports the Windows 3.x program groups into Windows NT.
When you install Windows NT on top of Windows 3.x, all of your .INI file data, .GRP file data, and REG.DAT data is migrated into the new Windows NT environment.
How to keep a 30-minute NT installation from ruining your whole weekend
An NT installation could take 30 minutes or three days. The need for a three-day effort is often the result of insufficient planning. There are three areas where problems commonly occur during installation. Forethought can go a long way toward preventing frustrations down the road.
The first problem area is hardware. NT is quite particular about compatible hardware. Check the hardware compatibility list (HCL) before you buy or install hardware. If a make or model is not listed, beware. It might be compatible, but you should do some checking. We got a call from a client who wanted us to come and complete his NT installation, which was giving him trouble. When we got to the site, he handed us a SCSI adapter and the instruction booklet. Now, picture the size of a dollar bill folded in half. This was the size of the hardware manual. On its pages were installation instructions in four languages, none of which I recognized (and I speak 6). I didn’t have to check the HCL to know that this adapter was not going to be listed, but the client was still enthused about the adapter because he had paid $19.95 for it! You can imagine the conversation we had with the vendor: "Hello, we have one of your adapters and were wondering if you supported Windows NT?" Response: "I’m sure we do. Huh, by the way, what is Windows NT?"
You encounter the second problem area early in the installation process, when you must choose which partition will hold the NT system files and what size it will be. We recommend installing the system files on a separate partition. You don’t want to make the partition too big (wasting space that could be used for data) and you don’t want to make it too small. We had a client using a partition size of 250MB, which seemed reasonable to him, as it was twice the minimum size recommended. The gotcha came when he tried to add more services and found that there wasn’t enough room. In a situation like this, absent a third-party utility, you’d have no choice but to tear down the partition and reinstall NT.
The third problem area is the network card. You should identify the NIC parameters before you start the installation. NT might auto-detect the NIC, and it might not. While NT recognizes many network cards, it might not recognize the IRQ, I/O, or DMA settings of the NIC you have installed. In the classroom, we try to use the same NIC (and settings) in all machines, and we give the students this information for their installations. Still, in a class of ten students, two will get the settings wrong, and another will accept the defaults that NT presents, which is also incorrect. They can’t finish the installation until they go back and correct the settings. The catch is that, while most NICs have a program that tests the NIC and tells you what the settings are, you cannot access this program while you are doing the installation. And if you are doing an over-the-network installation and pick the wrong NIC, you can’t connect to the server to install the proper NIC later.
OK, you are now ready to perform a new installation. Here is a simple checklist of information and preliminary actions that will help you avoid any problems along the way:
| Check the HCL to make sure that your hardware is going to be compatible. | |
| Make sure you have the NT 4.0 Workstation CD-ROM available. | |
| Partition your hard disk according to your needs. | |
| Make sure you have all relevant network information (TCP/IP, computer name, domain, permissions to add the computer to a domain, and so on). | |
| If you are upgrading your system, be sure to back up all of the important files currently on your computer to either a network share or a tape storage device. | |
| Gather all the driver diskettes and configuration settings for third-party hardware like tape drives or mass storage devices. | |
| Make sure you have a blank floppy disk for the Emergency Repair Disk (ERD). Use a 3.5-inch 1.44MB disk for the ERD. Although the ERD is optional for running Windows NT, it is always good practice to be safe rather than sorry with your computer. It only takes seconds to make an ERD and that can save you hours upon hours later. Make sure that you create an ERD during installation and update it every time you make changes to your configuration, such as restructuring partitions, adding new disk controllers and other software, or installing new applications. | |
| If you are doing a network installation, make sure you have network access to the Windows NT Workstation files. |
Installing NT for Dual-Boot Purposes
Windows NT has no problem dual-booting between operating systems. You can install multiple versions of Windows NT on an NTFS or FAT partition, or another operating system on a FAT partition, such as MS-DOS or Windows 95. When you first install Windows NT workstation on the boot partition, Windows NT takes control of your boot menu and creates an entry for itself and for MS-DOS if installed on a FAT or an NTFS partition. If you are dual-booting between Windows 95 and NT and they are on the same partition, make sure that you do not convert the file system from FAT to NTFS because Windows 95 or MS-DOS cannot recognize NTFS partitions. Operating systems that are currently supported include MS-DOS, Windows 95, and OS/2 versions 1.1 and 1.3. OS/2 version 2.x might work, but it is not supported.
If you are installing another version of NT for dual-boot purposes, make sure that you install each version of Windows NT in a separate directory. If you install them in the same directory, it will upgrade your NT build. The NT boot loader is smart enough to recognize another version of Windows NT and will update the BOOT.INI file.
There are third-party utilities like Boot Commander available that take control of your computer and create separate partitions so that all of your operating systems coexist happily. You can install Novell, LINUX, Windows NT, OS/2, or any other operating system and they will all work together in separate hard disk spaces. Instead of Windows NT’s Boot Loader taking control of the operating system, Boot Commander does it for you.
Setting Up Windows NT Workstation 4.0
After using the setup utility to begin the installation, the setup files are copied to the local hard disk to speed the installation. This is much faster than accessing them from a network share point or CD-ROM since the files are stored locally. Once all of the files are copied to the local hard disk, text mode setup begins. This part of setup tries to identify your hardware and begins asking you questions about how you would like to set up Windows NT 4.0 Workstation according to your specifications. You also have the chance to add any drivers in case Windows NT does not identify all of your hardware.
Once your computer finishes rebooting after text mode setup, the graphical portion of setup begins. In this section you’re prompted for information such as network settings, monitor settings, and specific user information. After the graphical portion of setup finishes, the computer saves your configuration, reboots, and you can begin using Windows NT 4.0 Workstation.
After the Windows NT setup utility copies the installation files to the local hard disk, Windows NT tries to identify what type of hardware is in your computer. Among other things, NT looks for the processor type (x86, MIPS®, ALPHA, or PPC), motherboard type (PCI, VESA, MCA, EISA, or ISA), hard disk controllers, file systems (FAT or NTFS), the amount of free space on your hard disk, and the amount of memory in your system. If your hardware is not detected correctly during this phase, you can almost be guaranteed that setup will fail during the graphical mode phase.
Again, this points out the importance of the Hardware Compatibility List. Setup should run smoothly if your hardware is listed on the HCL. If the setup process cannot find all of your hardware devices, or if you have additional devices such as mass storage devices or non-supported hardware, add the necessary drivers when setup asks you.
During the partition selection stage of setup, you can select the partition on which the operating system will be installed. It is a good idea to have all of your partitions set up before you begin so that you do not have the hassle of trying to set them up while installing the operating system. You can use the MS-DOS FDISK.EXE utility to create new partitions or delete existing partitions.
Once you decide which partition you want to install Windows NT 4.0 Workstation on, you can either leave the current file system as is or you can convert the file system to NTFS. It is a good idea to convert your files system to NTFS if you are not going to be dual-booting with MS-DOS or Windows 95 to take advantage of some of the features NTFS provides for Windows NT, like security, performance, and fault tolerance.
Before beginning a Windows NT installation, you want to be certain that there are no problems with your hard disk, such as bad clusters, physical flaws, or a corrupted boot sector that might prohibit Windows NT from successfully installing. Windows NT gives you two options for examining your hard disk automatically during setup: You can perform an exhaustive examination or a simple one. Because the time difference involved between the two approaches is negligible, you should usually perform an exhaustive examination.
The Windows NT graphical setup wizard guides you through the final stages of the setup process. During this phase, you must provide the setup program with information such as your computer’s name, what additional components you want to install, and what networking you want to set up. The NT networking phase asks you for the network card type, the protocol, and the monitor settings. Once NT has all of this information, it processes the settings, finalizes setup, and saves your configuration. This is the last phase before the setup process reboots your system and lets you log on.
You can choose from the following options when configuring Windows NT Workstation:
| Typical—Installs the default settings and most commonly used optional components. This is the recommended option. | |
| Portable—Takes advantage of setup options for portable or laptop computers. | |
| Compact—To save disk space, does not install any optional components. This option is useful for installing on old computers where disk space is at premium. | |
| Custom—Lets you pick and choose what options you want to install depending on your system configuration. This option gives you the most flexibility for installing Windows NT. |
Supplying User Information and a Computer Name
The setup process prompts you for user information and a computer name to be used for licensing agreements and product registration.
The user information you supply is used for registration and licensing purposes. The setup process asks you who owns the license for the software you are installing. Enter your name and the name of the organization that sent you the software.
The computer name you supply identifies your computer on the network. The name must be a NetBIOS-compatible name of 15 characters or less. It must be unique on the network. If you are using WINS in your network, your computer name will be registered dynamically when the computer boots or a user logs onto the network.
Creating an Emergency Repair Disk
During setup, you are asked if you want to create an Emergency Repair Disk (ERD). This step is optional, but it is highly recommended. If you ever have to repair a damaged version of Windows NT, if your computer ever crashes because of a bad installation, a corrupted registry, a bad boot sector, or if it is unable to start NT Workstation, you’ll be glad that you made an ERD. The vital information it contains may help you repair the workstation.
If you decide not to create an ERD during installation, you can create one later by running RDISK.EXE after Windows NT finishes booting. (Just type RDISK.EXE at the command prompt.) The information stored in the WINNT\REPAIR folder on your local workstation is copied to the ERD.
Although you cannot repair all Windows NT problems using an ERD, this disk gives you a fighting chance. Remember that the ERD you create on one computer is for that computer only, and should never be used on another computer. (While it is possible to use an ERD on another computer with similar hardware, it is not recommended and not supported by Microsoft.)
Emergency Repair Disk Contents
An ERD contains the following system information that is necessary to rebuild a broken machine. The following files are copied from the Winnt\System32\Repair directory to the Emergency Repair Disk in compressed form:
| AUTOEXEC.NT—Used for MS-DOS applications running the _DEFAULT.PIF | |
| CONFIG.NT—Used for MS-DOS applications running the _DEFAULT.PIF | |
| DEFAULT.—Registry key HKEY_USERS\DEFAULT. | |
| NTUSER.DA—Copy of user profiles | |
| SAM.—Registry key HKEY_LOCAL_MACHINE\SAM | |
| SECURITY.—Registry key HKEY_LOCAL_MACHINE\SECURITY | |
| SYSTEM.—Registry key HKEY_LOCAL_MACHINE\SYSTEM | |
| SOFTWARE.—Registry key HKEY_LOCAL_MACHINE\SOFTWARE |
Exercise 2-13 Creating an Emergency Repair Disk
The purpose of an Emergency Repair Disk is to create a backup of your system files in case of an operating system failure.
For this exercise, all you need is one blank floppy disk.
To create an ERD:
- Insert a blank disk into the floppy disk drive.
- At the command prompt, type
C:\RDISK.EXE /S
The /S switch instructs the system to update the information in the WINNT\REPAIR directory on your local workstation.
- When the system asks if you want to create an ERD, choose Yes.
- After you create the ERD, make sure you label the disk clearly with the name of the system and the date, and store it in a safe place so that you don’t overwrite it or misplace it unintentionally
Exercise 2-14 Initiating a Recovery with Your Emergency Repair Disk
Once you have created an ERD, it is helpful to know what to do with it in case you ever have to repair your system.
For this exercise, you need an ERD, the Windows NT setup boot floppies, and the Windows NT 4.0 operating system source files.
To initiate a recovery from an ERD:
- Boot your computer from the Windows NT setup floppies, stopping after you insert NT setup disk number 2.
- When the system asks whether you want to perform a recovery, answer Yes.
- Insert the ERD.
- Choose Recovery.
The remaining steps needed to complete the installation of Windows NT Workstation include supplying information about network adapters, protocols, workgroups or domains, and display settings. It is a good idea to gather this information beforehand, and verify that all of the hardware is listed on the HCL.
Windows NT 4.0 Workstation is a network operating system, and offers features specific to participating in a networking environment. You can hook up directly to a LAN, or you can be connected to a network remotely if you have enough bandwidth to dial up. In order to start the network, you must make sure that you entering the correct settings during installation. Make sure that you have the correct driver diskettes for your network adapter in case Windows NT does not detect your card. Also make sure that you enter the correct information about the protocols to use. If you enter the wrong TCP/IP address or specify the wrong frame type during installation, serious network problems could result once your computer finishes setup.
There are three options available under Network Settings that allow you to access a network in the following ways:
| Across a wire—This is the most common type of connection. Depending on your network adapter, you can connect via Ethernet or Token-Ring. Both of these connection types have distinct advantages and disadvantages depending on your environment. The most obvious difference between the two is speed. An Ethernet Category 5-type connection can reach speeds of 100MB per second, while a Token-Ring connection can reach speeds of only 16MB per second. Although these are the top speeds for each connection type, the actual performance speed depends on network traffic on your LAN or WAN, and will probably be lower. | |
| Across a cable—If you do not have a hub or Local Area Network to connect to, you can connect two computers with a special type of cable called a Null-Modem cable. This cable takes the place of a hub and allows two computers to talk directly to one another instead of sending data to a hub first. | |
| Via dial-up access—This type of connection is much slower than being connected directly to the network. The speed of your modem or ISDN line limits the speed of your connection. Windows NT has special features that help with slow connections, but you probably do not want to run any applications over a dial-up connection unless you have a lot of time or a really fast connection. |
Your network card should be auto-detected during setup, but if it is not, you must enter the IRQ, the I/O address, and the base memory address. If these settings are not correct, the network fails to start when you log on, and you receive a message while booting up that a service or driver failed to load. Usually the hardware vendor for your card provides you with a network configuration diskette that tells you exactly what the settings should be. Verify these settings before you begin the setup process to save time. As you configure your card, you’ll be asked whether you are wired to the network or connecting via the Remote Access Service (RAS).
Wired to the Network
This is the most common configuration. If you select this option, you will be directly connected to the network through your network adapter via a cable that connects you to an RJ-45 jack or a BNC connector.
Remote Access
If you choose to set up remote dial-in capabilities, the Remote Access Service installs itself and you must enter the setting for your modem. You can also select the Dial-Up option from your logon menu during startup.
Depending on your network card, you can let Windows NT try to auto-detect it, you can select it manually from a list, or you can add drivers to help Windows NT identify it.
To make sure that you have supported hardware in your machine, check the Hardware Compatibility List before choosing a network card. Remember: Microsoft does not support hardware that does not appear on the HCL.
You can choose one of the following options for determining how your network card is selected:
| Select from list—If your network card is not auto-detected and you know what network card is presently in your computer, you should select this option. A list appears and you can select your card from those choices. If you do not see your network card in the list provided by Windows NT setup, you can select Have Disk and provide the network drivers yourself from the disk provided by the hardware manufacturer. | |
| NT finds/selects—If your network card can be auto-detected you will save yourself a great amount of trouble. Windows NT setup tries to set up your card automatically depending on what your hardware resources are. Located in the "Guide to Automating Windows NT 4.0 Setup" is a list that Microsoft provides of detectable network cards. This is a very helpful option to choose. |
If you do not have a network adapter card installed in your computer, select MS Loopback Adapter. Once you do, the following procedure allows you to detect a problem with the network adapter or the network adapter driver and work around the network adapter installation problems during Windows NT Setup:
- In the Network Settings dialog box, remove all network adapters from the Installed Adapter Cards list.
- Choose Add Adapter and select the MS Loopback Adapter and click Continue.
- The only configuration information required for the MS Loopback driver is Frame Type. Valid frame types are:
| 802.3 (Ethernet) | |
| 802.5 (Token Ring) | |
| FDDI |
Choice of frame type is not critical, so selecting 802.3 should be sufficient. If you’ve experienced a problem caused by a network adapter hardware conflict or driver problem, the setup program should now continue. The MS Loopback Adapter also can be used to isolate configuration problems from hardware problems on existing Windows NT installations.
Windows NT uses protocols to communicate with other computers. As long as the computers are using the same protocol, they will be able to communicate. Some protocols are used to communicate with different computers. The protocol suite TCP/IP is used on the Internet for communication, IPX/SPX is used to connect to Novell Networks and DCL is used to connect computers to Hewlett-Packard printers or Mainframes. Depending on who you need communicate with will depend on what protocols you will install during Windows NT setup.
Windows NT 4.0 communicates to other workstations and computers on the network using different types of protocols. The protocols installed on your Windows NT Workstation determine what type of computers your NT Server can communicate with. To allow the for the widest range of communication, Windows NT Workstation offers many different types of protocols that can be installed, including TCP/IP, IPX/SPX, and NetBEUI. Each of these protocols has advantages and disadvantages. Some protocols, like NetBEUI, are not routable or cannot talk to other networks on the other side of a router. Examples of two routable protocols are TCP/IP and IPX/SPX. TCP/IP is used regularly on the Internet, and IPX/SPX is used primarily to communicate with Novell networks.
Depending on the specific needs of your networks, you will need to install some of these protocols. It is important to note that having more protocols installed on your Windows NT Workstation causes more traffic than if you just install only one. For example, if you have an NT Server that has the protocols NetBEUI, IPX/SPX, and TCP/IP installed, you might create a network traffic overload. When you try to communicate with another computer on the network, your workstation tries to talk to the destination computer with each and every protocol! Even if you are using only TCP/IP, your server will first try to communicate using NetBEUI, then IPX/SPX, and finally TCP/IP. This can cause a lot of unwanted network traffic. For maximum performance, you should remove the unused protocols from your server.
TCP/IP
TCP/IP stands for Transmission Control Protocol/Internet Protocol and is an industry-standard suite of protocols designed for local and wide-area networking. TCP/IP was developed in 1969 as the result of a Defense Advanced Research Projects Agency (DARPA) research project on network interconnection.
This protocol has gained most of its popularity through its wide use for Internet communication, connecting computers together throughout the world. TCP/IP is known for being both reliable and routable, and for being able to talk to foreign networks.
Windows NT TCP/IP allows users to connect to both the Internet and to any machine running TCP/IP and providing TCP/IP services, including some applications that require TCP/IP to function.
Advantages of the TCP/IP protocol include:
| Provides connectivity across operating systems and hardware platforms. This protocol is the backbone of the Internet. If you need to connect to the Internet, you need this protocol. | |
| It’s routable, meaning that you can talk to other networks through routers. | |
| Very popular. (Think of all of the computers on the Internet.) | |
| Some applications need TCP/IP to run. | |
| Provides connectivity across operating systems and hardware platforms. Windows NT can FTP to a UNIX workstation. | |
| Offers Simple Network Management Protocol (SNMP) support. (Used to troubleshoot problems on the network.) | |
| Offers Dynamic Host Configuration Protocol (DHCP) support. (Used for Dynamic IP addressing.) | |
| Offers Windows Internet Name Service (WINS) support. Resolves Windows NetBIOS names on the network. |
NWLink IPX/SPX-Compatible Transport
The most common use of the IPX/SPX protocol is connecting to Novell networks. You should also select this protocol if you use any applications that need IPX/SPX. Make sure that when selecting IPX/SPX, you pick the correct frame type.
NWLink is simply a protocol by itself and it does not allow a Windows NT workstation to access files or printers on a NetWare server. To access files or printers on a NetWare server, you have to make sure that you have Microsoft’s Client Service for NetWare (CSNW) installed or Novell’s NetWare Client for Windows NT. You can also use IPX/SPX to gain access to an NT Server that has Gateway Services for NetWare installed or a SQL Server that is using the NWLink protocol to communicate.
You should remember the following information about IPX/SPX:
| Ability to connect to Novell networks. | |
| You might need this protocol to connect to an application server running IPX/SPX. | |
| You need Client Services for NetWare to gain access to files and printers that reside on a NetWare server. |
NetBEUI
Because of its speed, the NetBEUI protocol is best suited for Local Area Networks that do not connect to the Internet. The main limitation of this protocol is that it is not routable. Remember the following characteristics of NetBEUI:
| Very fast. | |
| Only used for Local Area Networks (LANs). | |
| Additional protocols may be added if necessary. |
The DLC protocol is used to connect to printers using the Hewlett-Packard network attachment cards (internal or external) and mainframes.
The DLC protocol is used primarily for:
| Accessing IBM mainframes (usually with 3270 applications). | |
| Printing to HP printers connected directly to the network. |
AppleTalk
The AppleTalk protocol is used to communicate with Macintosh networks. Generally, an NT Server with Services for Macintosh will use this protocol to communicate with the Macintosh clients.
Point-to-Point Tunneling Protocol
Point-to-Point Tunneling Protocol allows users to create secure, virtual private intranets over public networks like the Internet. This technology simply allows the Remote Access Service (RAS) to create secure private networks and allows for secure communication over public data lines.
Enter Settings for Workgroups and Domains
In this section of setup, you have to decide whether to make your computer a member of a workgroup or a domain. For workstations participating in a small network of computers not requiring central administration, the workgroup environment should work best. For workstations in a larger environment that need security, central administration, and access to data across the network, you should join an existing domain.
A workgroup or peer-to-peer network is generally used in environments using 10 workstations or fewer that do not require central administration. A workgroup is also usually used for a small group of workstations that need access to resources on other computers in the workgroup. In a workgroup, every workstation that participates in the workgroup is its own local administrator. Workgroup computers manage their own local resources through their local account database. All user accounts are stored locally on the workstation instead of on a domain controller. Workgroup computers do not share security with other computers in the workgroup or rely on other computers to provide security for their local resources.
If you choose a workgroup, NT prompts you for the local machine account username and password that allows you to log on to the local workstation. Make sure that you keep this information in a safe place. If you lose or forget the password for the local machine account you have to reinstall Windows NT workstation to recover your workstation.
Domain–Enter the name of the domain to which you want to connect.
A domain environment is used for large numbers of computers that require central administration, centralized security, and access to resources on other computers. In a domain, all user accounts are stored in a common account database that resides on a primary domain controller and is replicated to all of the backup domain controllers. Like a workstation, a domain has a unique name that identifies it. Users who have domain accounts are subject to the security and policies of the domain. A domain provides logon validation to enforce security throughout the domain.
If you select a domain to join, you need to make sure that you have sufficient privileges for joining the domain. Normally, you have to have Account operator privilege, or be given this specific privilege in User Manager for Domains. Once this information is entered and validated, you computer becomes a member of the domain. You can also add the workstation to the domain prior to installation so you are not prompted during Windows NT setup. After the necessary domain information has been entered, you are prompted for the password for the system’s local administrator account. Like a workgroup configuration, this administrator account provides access to the local machine.
You are almost finished with your Windows NT 4.0 Workstation installation. If you have gotten this far, you just have to fill in some trivial information like date, time and time zone. Once these settings are complete, you are almost ready to save your configuration, reboot the computer, and log on to your brand new Windows NT 4.0 Workstation.
You should select your date and time depending on your geographic location. Just enter the time, date, and time zone. Windows NT stamps files with Greenwich Mean Time + the number of hours to the specified time zone. This is helpful in situations where the absolute time of file creation may be required. If a file created on the West Coast is modified on a computer on the East Coast, the file timestamp maintains correct information.
The Display Properties screen allows you to configure your video adapter and monitor settings. Standard VGA with 16 colors is the default.
| Video Adapter—In case Windows NT cannot find your video adapter card during setup, you can choose your adapter from a list or provide the setup program with drivers supplied by you from your hardware vendor. If you cannot set up the video adapter, you can choose VGA resolution and then set up your adapter once installation finishes. If for any reason Windows NT fails to come up because of video resolution problems, you can choose VGA mode during the boot process and then fix your display settings. | |
| Monitor Settings—How powerful your video adapter is has a direct effect on what type of monitor settings you can use. What type of monitor you have also has an effect on what type of monitor settings you can use. Check whether your monitor is on the Hardware Compatibility List. If it appears there, you should not have a problem with installation. If you do have a problem, you can choose VGA settings and change the video and monitor settings once Windows NT setup is finished and you log on to your workstation. | |
| Default—If you choose the default settings, you get whatever settings Windows NT detects during setup. You can always change the default settings once you log on to your workstation. |
Removing Windows NT Workstation
If you are not happy with your Windows NT installation or operating system, you always have the option of removing Windows NT. There are a couple of ways to do this, depending on how your system is configured and what type of file system you are using with Windows NT Workstation. Whatever method you choose to remove Windows NT, you need to perform a few steps using either FDISK.EXE or a third-party tool such as Partition Magic.
Remove the NTFS Volume, If Necessary
Although an NTFS partition is difficult to remove, it can be done with a variety of partition utilities. Some of these tools include FDISK.EXE, Partition Magic, DELDISK.EXE, or Delpart. If you use FDISK.EXE to remove an NTFS partition, you have to follow a clearly defined set of steps. Other partition tools work equally well, but require more care.
Exercise 2-13 Deleting an NTFS Partition
If you are trying to remove an NTFS partition from your hard disk, you have to use an executable called FDISK.EXE. FDISK.EXE removes the NTFS or non-DOS partition from your hard disk as long as your NTFS partition is not on an extended partition. You will lose any data on the NTFS partition, so back up the data prior to starting.
To delete an NTFS partition:
- Start Windows NT installation from floppy disks or a CD-ROM.
- When you are prompted, type D to remove the partition.
Located on the Windows NT 3.51 resource kit is the NTFS partition removal utility, Delpart. Delpart can remove an NTFS partition quickly and easily. All you have to do is tell which NTFS partition you need removing and Delpart takes care of the rest. If you use this utility, make sure that you save your changes once you decide which partition to remove.
Change the Boot Operating System
To completely remove Windows NT from your hard disk, you have to change the boot operating system. To change the boot operating system, you can use a command-line executable (SYS) to change the system files from Windows NT to MS-DOS. After the computer finishes rebooting after you "SYS" the hard disk, you can boot straight to MS-DOS.
Exercise 2-14 Changing the Boot Loader to MS-DOS in an Existing FAT Partition
If you need to remove NT from a FAT partition, you have to issue the SYS command on the boot drive that Windows NT is located on. The SYS command replaces the NT boot sector with the MS-DOS boot sector and allows your computer to boot from MS-DOS. If your system files reside on the C: drive, then you need to SYS the C: drive. If your system files reside on the D: drive, then you use the SYS command on the D: drive, and so on. After you replace the boot sector on your hard drive, you still have to remove the Windows NT system files. These can be removed with the DELETE command.
To change the boot loader to MS-DOS in an existing FAT partition:
- Insert your MS-DOS boot disk into your floppy drive.
- Turn your computer on and let it begin booting from the floppy drive.
- At the MS-DOS prompt on the A: drive type
A:\sys c:
A:\Del C:\Pagefile.sys
A:\Del C:\Boot.ini
A:\Del C:\Ntldr
A:\Del C:\Ntdetect.com
A:\Del C:\Bootsect.DOS
or by typing:
A:\Del C:\Ntbootdd.sys
If you have a SCSI adapter on your computer, you also have to delete the file NTBOOTDD.SYS. This file resides only on computers using SCSI drives or adapters. To make sure that you have gotten rid of all your Windows NT files, type DEL *.*.
Exercise 2-15 Creating an MS-DOS Boot Partition
To create an MS-DOS partition, you need to use the MS-DOS utility, FDISK.EXE. This utility allows you to create a partition and make it active.
To create an MS-DOS partition:
- Insert the MS-DOS boot disk that contains the FDISK.EXE and FORMAT.COM programs.
- At the command prompt, type
A:\FDISK.EXE
A:\Format C: /S
This command formats the C: drive with the MS-DOS system files. You can now boot off of the C: partition.
If You Currently Have a FAT Partition
If you currently have a FAT partition and you want to make the partition bootable, all you have to do is format the drive with the /S switch. This places the MS-DOS system files onto the drive.
A:\Format C: /S
You will be prompted to verify the format before any action can take place. Once this is done the drive will be formatted.
If You Currently Do Not Have a FAT Partition
If you are using an HPFS partition, you have to convert the file system to NTFS in order to install Windows NT 4.0. NT 4.0 does not support HPFS. If you are using an NTFS partition, the only way to install Windows NT is through an existing version of NT.
If you have an NTFS partition you must first remove the partition by using FDISK.EXE.
Remove Windows NT from a FAT Partition
Removing Windows NT from a FAT partition is much easier than removing Windows NT from an NTFS partition. To remove Windows NT from a FAT partition, you basically just delete the NT files and directories from the hard disk. Once this is completed, you can remove the NT loader by using the SYS command.
Exercise 2-16 Removing NT from a FAT Partition
If you want to remove Windows NT from a FAT partition you use the MS-DOS command DELTREE.EXE to remove directories, and the DEL command to remove files. This eliminates any existing sections of the Windows NT installation.
To remove NT from a FAT partition:
- Insert the MS-DOS boot disk that contains the DELTREE.EXE command.
- Turn on your computer and boot off of the MS-DOS boot disk.
- Delete the Winnt or %Systemroot% directory by typing the following command at the MS-DOS command prompt:
A:\Deltree C:\Winnt
A:\Del C:\PAGEFILE.SYS
A:\Del C:\BOOT.INI
A:\Del C:\NTLDR
A:\Del C:\NTDETECT.COM
A:\Del C:\BOOTSECT.DOS
You should now have all of the Windows NT system files and directories removed from your computer.
The information in this chapter relates directly to what you will be tested on in the Windows NT 4.0 Workstation exam. Through the detailed explanations and exercises provided, you should feel better prepared to pass this exam. Let’s review what was covered. The examples below are taken directly from the exam preparation page on Microsoft’s web site, which explains exactly what will be covered on the exam. You should make sure you understand these key points before taking the exam.
In this chapter you have learned how to create unattended installation files, and used an UNATTEND.TXT file to create a script to automate Windows NT Workstation installations. This technique allows you to roll out multiple Windows NT Workstations at once.
The exam will ask you to choose the appropriate file system to use in a given situation. Your choices include the NTFS, FAT, and HPFS file systems. The NTFS file system is made especially for Windows NT. By using NTFS on your partitions you can take advantage of its security features, fault tolerance, and performance. We also looked at the FAT file system. The FAT file system gives you move flexibility with other operating systems, but you will not be able to make use of some of Windows NT’s security features. Lastly we looked at the HPFS file system. HPFS is no longer supported with Windows NT 4.0, so you must either delete the HPFS partition or convert the partition to NTFS during setup. We looked at security on the workstation and NTFS provides that for us. If you want security for your workstation you need to use NTFS security for an NTFS partition. NTFS gives you both file and directory security with Windows NT. Remember that you cannot set file permissions or use auditing on a FAT partition.
An important part of the exam covers dual-boot systems. If you decide to dual-boot between Windows 95, MS-DOS, and Windows NT, you need a FAT partition. Windows 95 and MS-DOS are unable to recognize any NTFS partition. If you are using NTFS, however, you can install multiple versions of Windows NT without any problem.
For installation exercises, we installed Windows NT Workstation on an Intel platform in a given situation. The first step in installing Windows NT 4.0 is verifying the hardware requirements. If your hardware meets the specifications, you can decide what type of installation to use. Along with the CD-ROM and network installation options, you can use the /B switch for a floppy-less installation. You need to remember that for any previous version of Windows NT you have to use the 32-bit setup utility, WINNT32.EXE. For all other versions of MS-DOS or Windows, you need the 16-bit version, WINNT.EXE. We also set up a dual-boot system in a given situation. Dual-booting between Windows NT and either MS-DOS or Windows 95 is possible. You can dual-boot with MS-DOS or Windows 95 if you have a FAT partition. If you dual-boot with Windows NT you can have either an NTFS partition or FAT. If you are setting up the machine from scratch, you should install Windows 95 first and then Windows NT.
In case something goes wrong with a Windows NT Workstation or its installation, you can remove Windows NT Workstation by either deleting the partition using the fixed-disk setup program, FDISK.EXE, or by using the SYS command to replace the Windows NT boot sector with the MS-DOS boot sector.
Besides installing Windows NT 4.0 workstation, you also can upgrade to Windows NT Workstation 4.0. Remember that you can only upgrade from MS-DOS, Windows 3.x, and previous versions of Windows NT. Upgrading from Windows 95 is not an option. For multiple installations, you can configure a server-based installation for wide-scale deployment. To configure a server-based installation, you must use all the tools provided as part of the installation process, including SYSDIFF.EXE (which pre-installs applications as part of setup), an UNATTEND.TXT file (which serves as a script for answering setup questions), and Unique Database Files (UDFs) (which replace content-specific information such as computer names and TCP/IP information).
| To witness the power of NT 4.0 Workstation, you should adhere to the recommended hardware requirements. | |
| The first thing you want to do is check the Hardware Compatibility List. | |
| Microsoft provides the Hardware Compatibility List as a detailed inventory of all supported and tested hardware for Windows NT 4.0. | |
| In order for Windows NT to be installed successfully, you must have an active partition (a "primary boot partition") of at least 120MB that is formatted as either FAT or NTFS. | |
| Windows NT installations are accessible from the network, local hard disk, or CD-ROM. | |
| There are also the options for upgrading, running fresh installations, and performing multiple installations. | |
| There are many different command-line switches available that allow you to perform floppy-less or unattended installations, or to create the three setup floppies. | |
| Remember that the files necessary to complete an unattended installation are SYSDIFF.EXE, UNATTEND.TXT, and Unique Database Files (UDFs). | |
| It is highly recommended that you create an Emergency Repair Disk (ERD). The ERD is a tool used to repair a damaged version of Windows NT. | |
| For a large number of installations, administrators may choose to install Windows NT over the network. | |
| To install network protocols without a network card, install the MS Loopback Adapter, and then install the network card once installation is finished. | |
| DLC is the protocol used to connect to printers using the Hewlett-Packard network attachment cards (internal or external) and mainframes. | |
| Whichever method you choose to remove Windows NT, there a couple of steps that require using FDISK.EXE or a third-party tool such as Partition Magic. | |
| To remove Windows NT from a FAT partition, you basically just delete the NT files and directories from the hard disk. Once this is completed, you can remove the NT loader using the SYS command. |
- Windows 3.1
- Windows 95
- Windows NT 3.51
- OS/2
- Phoebe’s boss wants her to install Windows NT 4.0 Workstation onto some legacy hardware. What choices does she have?
- 386/20, 48MB of RAM, 2.3GB hard disk
- 486/33, 16MB of RAM, 1.0GB hard disk
- 200 Pentium Pro, 64MB of RAM, 4.5GB hard disk
- 486 /100, 8MB of RAM, 3.0GB hard disk
- Nuala Anne wants to verify that all of the hardware that she is going to use for Windows NT workstation is compatible. How should she verify the hardware?
- Call the hardware vendor.
- Check the Hardware Compatibility List.
- Ask her Network Administrator.
- Doesn’t matter, Windows NT is compatible with everything.
- To partition your hard disk you use the _________.EXE utility.
- Ken accidentally lost his three setup floppies for installing Windows NT 4.0 Workstation. What command-line utility can he use to re-create them?
- WINNT.EXE /NO
- WINNT.EXE /B
- WINNT.EXE /U
- WINNT.EXE /OX
- Dermot is doing top-secret work and wants to take advantage of Windows NT’s security model. He is using a Pentium II 266, 4.3GB hard disk with 64MB of RAM. What file system should he use?
- HPFS
- NFS
- NTFS
- FAT
- Danielle needs to install Windows NT 4.0 from the network from an MS-DOS workstation client and does not need to create floppies. What setup utility should she use?
- WINNT32.EXE /B
- WINNT32.EXE /OX
- WINNT.EXE /B
- WINNT.EXE /U
- Michael was instructed to come up with a plan to implement unattended installations throughout his company’s enterprise-wide network. He also needs to pre-install applications and set up machine-specific parameters such as computer names and IP addresses. What files does Michael need to use?
- Windiff.exe
- SYSDIFF.EXE
- UNATTEND.TXT
- Unique Database Files
- Your company has just purchased four new Hewlett-Packard printers for your network. TCP/IP is already installed on your network yet you cannot connect to the printers. What protocol must be installed to talk to the HP printers?
- IPX/SPX
- AppleTalk
- DLC
- Point-to-Point Tunneling Protocol
- You accidentally edited the Registry of your computer. After you restart your computer, Windows NT will not load. What will help you restore your system?
- Emergency Repair Disk
- RESTORE.EXE
- SYSDIFF.EXE
- Windows NT 4.0 Server CD-ROM
- While installing Windows NT 4.0 Workstation, you encounter errors during installation of your network card. You still want to install a network device to continue the installation. What option should you pick?
- 3COM EtherLink III
- 56k modem
- MS Loopback Adapter
- Arcnet adapter
- What command lets you change the boot loader on your hard disk from Windows NT to Microsoft DOS?
- ROLLBACK.EXE
- SYS.EXE
- DELTREE.EXE
- RESTORE.EXE
- Holly is upgrading a previous installation of Windows NT Workstation 3.51 to Windows NT Workstation 4.0. She already has the three Windows NT setup floppies. What version of the Windows NT setup utility can she use?
- WINNT.EXE /B
- WINNT32.EXE /OX
- WINNT32.EXE
- WINNT.EXE /U
- What are the benefits for using NTFS partitions on your Windows NT 4.0 Workstation?
- Adapts to Windows NT security model.
- Compatible with UNIX workstations.
- Fault tolerant.
- Best for hard disks over 500MB.